Welcome to the world of driving, where unexpected adventures await us at every turn. Whether you’re cruising down the highway or navigating the bustling streets of Chicago, a flat tire is an unfortunate mishap that can strike anytime, anywhere. But fear not! Conquering the challenges of a flat tire is a skill every driver should master, and in this article, we will unveil the secrets to changing a flat tire with confidence and ease.
Picture this: you’re on your way to an important meeting, surrounded by the rush of city life, when suddenly you feel the dreaded thump-thump-thump. Your heart sinks as you realize you’ve fallen victim to a flat tire. While it may seem like a frustrating setback, know that changing a flat tire is not a feat reserved only for mechanics or seasoned car enthusiasts. With a bit of knowledge and the right tools on hand, you can become a flat tire-changing hero in no time.
In the upcoming sections, we will explore the step-by-step process of changing a flat tire, from gathering the necessary equipment and finding a safe spot to park, to removing the damaged tire and installing the spare. Additionally, we’ll touch on other roadside emergencies like car jump starts, car lockouts, and the importance of having a reliable towing service, such as Rick’s Emergency Roadside Assistance, by your side. So, rev up your confidence and let’s dive into the world of flat tire changes, where resilience reigns supreme.
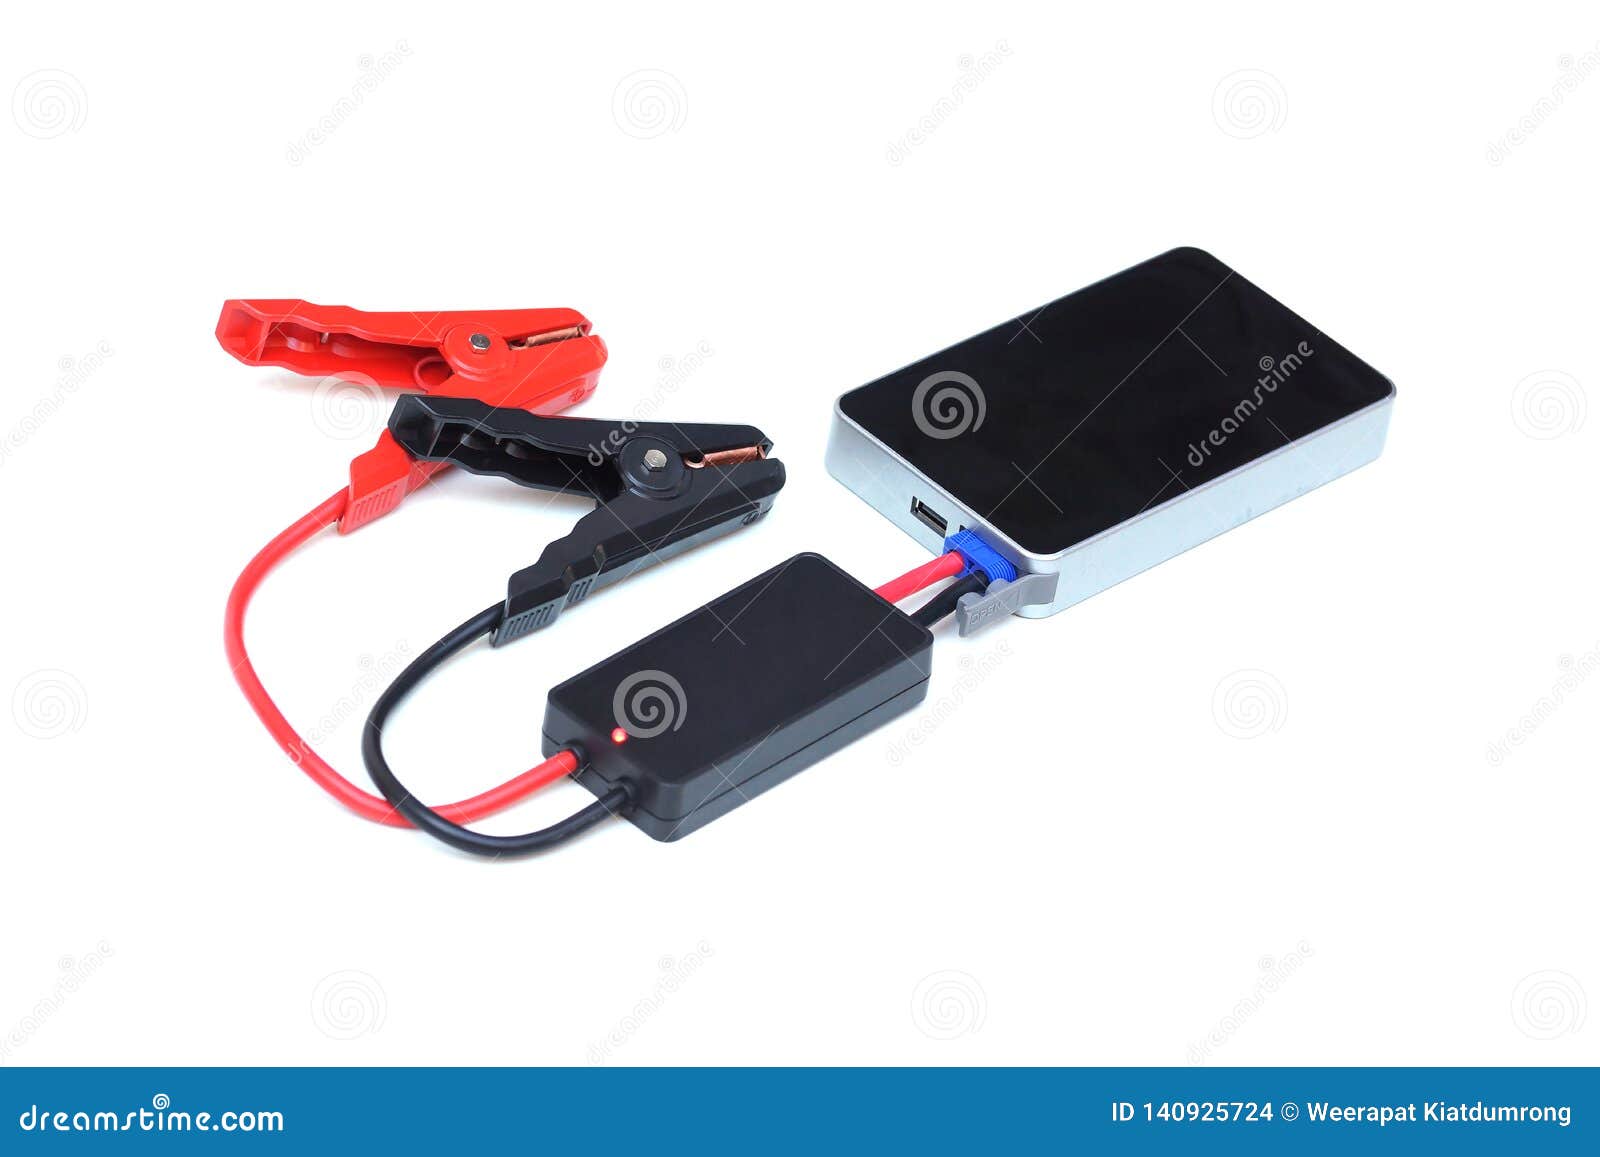
Mastering Car Jump Starts
Paragraph 1:
Car jump starts can be a lifesaver when you find yourself stranded with a dead battery. Whether it’s a cold morning or you accidentally left your headlights on overnight, knowing how to jumpstart your car can save you time and money. With a few simple steps and the right equipment, you’ll be back on the road in no time.
Paragraph 2:
To start, you’ll need a set of jumper cables and another vehicle with a working battery. Park the assisting vehicle close to yours, making sure the two cars don’t touch each other. Turn off both engines and engage the parking brakes for safety. Open the hoods of both vehicles and locate the battery terminals.
Paragraph 3:
Identify the positive and negative terminals, usually marked with a plus and minus sign. Begin by connecting the red positive cable clamp to the positive terminal of the dead battery. Then, attach the other red clamp to the positive terminal of the assisting vehicle’s battery. Next, connect one black clamp to the negative terminal of the assisting vehicle’s battery. Finally, secure the remaining black clamp to an unpainted metal surface on your car away from the battery. Start the assisting vehicle’s engine and let it run for a few minutes before attempting to start your own car. Once the dead battery has enough charge, try starting your car. If successful, remove the jumper cables in reverse order, being careful not to touch any metal surfaces with the cable clamps.
Handling Car Lockouts
Getting locked out of your car can be incredibly frustrating and inconvenient. However, with a few simple steps, you can handle this situation effectively.
Firstly, try not to panic. Take a moment to assess the situation and see if there are any alternative ways to access your vehicle. Sometimes a window may be partially open or you may have a spare key hidden nearby.
If you are unable to find any immediate solutions, it’s time to seek professional help. Contact a trusted roadside assistance service like "Rick’s Emergency Roadside Assistance." They specialize in helping individuals who find themselves in tricky situations like car lockouts.
The experienced technicians at "Rick’s Emergency Roadside Assistance" will swiftly arrive at your location and use their expertise to safely unlock your car. With their help, you can regain access to your vehicle without causing any damage. Having a reliable partner like "Rick’s Emergency Roadside Assistance" can provide peace of mind knowing that help is just a phone call away.
Steps for Flat Tire Changes
-
Inspection and Safety First
Before starting the flat tire change process, it is important to prioritize safety. Ensure that your vehicle is parked on a level surface and engage the parking brake. Additionally, turn on your hazard lights or place warning triangles behind your vehicle to alert other drivers. Carefully inspect your flat tire to identify any visible signs of damage or foreign objects lodged in the tire. -
Gathering the Necessary Tools
To successfully change a flat tire, you will need a few tools. Begin by locating your spare tire, usually found in the trunk or attached to the back of your vehicle. Next, retrieve the jack and lug wrench provided with your car. These tools are essential for lifting the vehicle and removing the lug nuts. -
Changing the Flat Tire
24/7 Auto Lockout Services
Start by using the lug wrench to loosen the lug nuts on the flat tire. It is crucial to loosen them before lifting the vehicle to ensure better leverage. Next, locate and position the jack underneath the vehicle’s designated lift point, which is typically indicated by an arrow or diagram on the car’s body. Begin raising the vehicle using the jack until the flat tire is completely off the ground. Once the vehicle is securely lifted, continue removing the lug nuts and carefully pull the flat tire off. Finally, align the spare tire with the wheel bolts, replace the lug nuts, and tighten them as much as possible. Lower the vehicle back down using the jack and use the lug wrench to ensure the lug nuts are fully tightened.
Remember, changing a flat tire requires caution and patience. If you are unsure about any step in the process, it is advisable to contact a professional roadside assistance service like "Rick’s Emergency Roadside Assistance" for reliable and efficient support.